

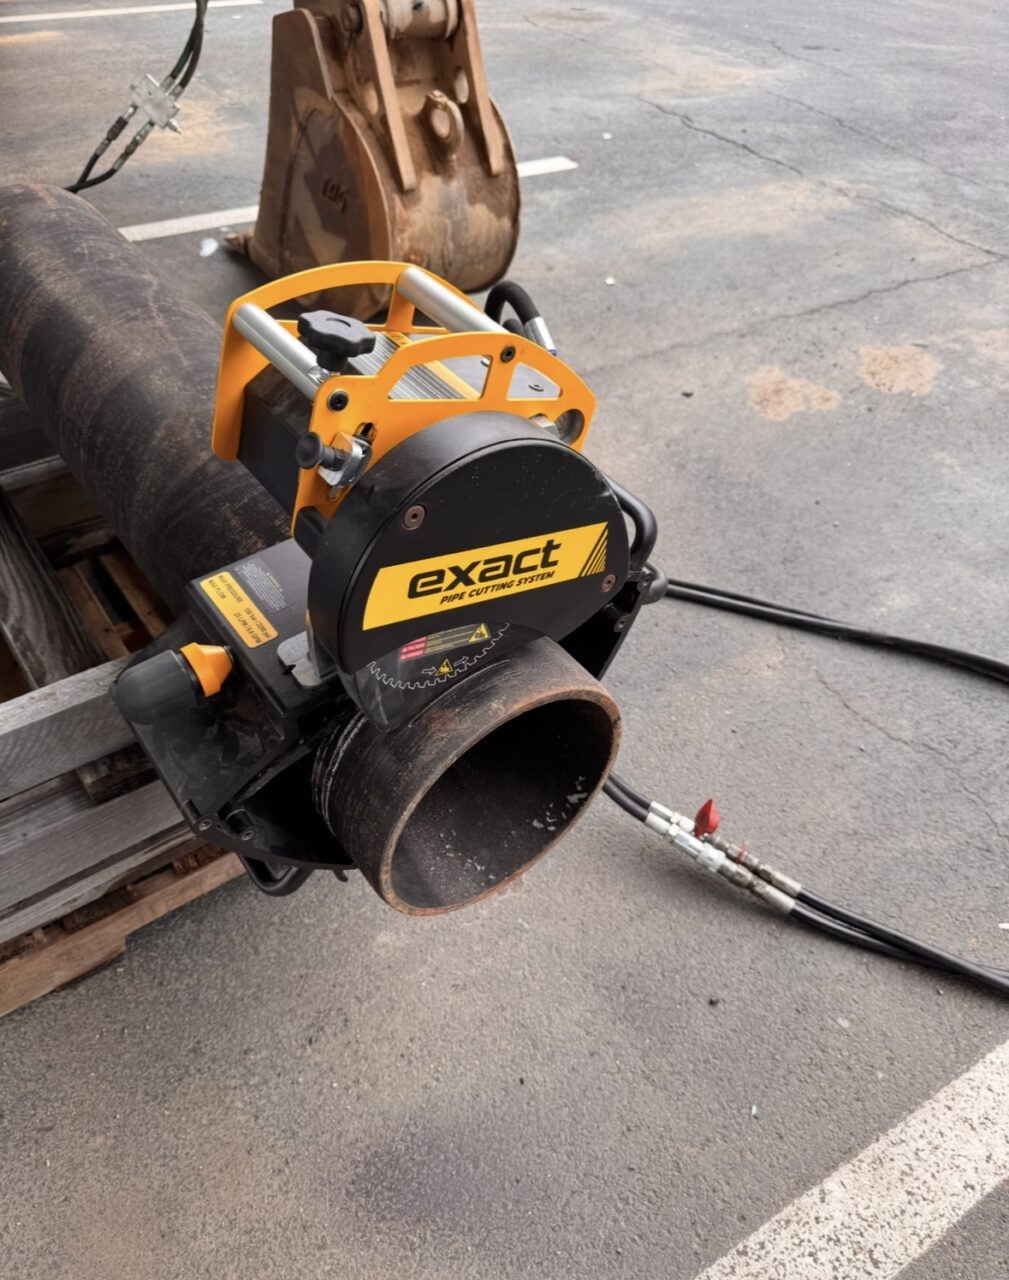
A good weld starts with a good bevel, and a good bevel starts with a good setup. This guide walks you through one complete job with a pipe beveling machine, in the order the work is done: checks, mounting, cutting head selection, pipe end preparation, running the bevel, repeating it across a batch, inspection and fixing problems when they show up.
Whether you work on site or in the shop, the aim is the same: clean, consistent weld bevels that fit up the first time. We use the Pipe Beveller 220E and 360E as examples throughout, because both are portable pipe bevellers built for this kind of work.

Pre-Job Checks for Your Pipe Beveling Machine
Confirm that the machine, the pipe and the work area are ready before you start. A few minutes here saves you from reworking a pipe end later.
Think of the beveller as the step after a square cut, not a replacement for it. It shapes a pipe end that is already cut straight. If you are weighing it against a hand grinder for the bevel itself, our comparison of pipe beveling versus grinding explains the differences in detail.
- Match the machine to the pipe. The Pipe Beveller 220E covers 25 to 220 mm (0.98 to 8.6 in) outside diameter, and the Pipe Beveller 360E covers 110 to 360 mm (4 to 15 in). Both handle a wall of up to 10 mm in steel, and both work on steel, stainless steel and aluminium.
- Check the kit. The 220E comes with the beveller, a shoulder bag, two pipe supports, instructions and a 5 mm Allen key. The 360E also includes two pipe supports. Make sure the supports are in the bag before you leave the shop.
- Confirm you have the correct cutting head. Cutting heads and tips are sold separately, and the head must match the bevel angle your welding procedure calls for.
- Inspect the cutting tips for wear and check that all three are seated.
- Check the power cable and housing for damage, and clear the work area of anything that could snag the cable.
When these checks pass, you have the right machine, the right head and a safe place to work. Next up is getting the beveller onto the pipe.
Mounting the Pipe Beveller and Setting Up the Supports
Secure the pipe and the beveller so nothing can shift while the head is cutting. Movement during the cut is a common cause of uneven bevels, so this step deserves your patience.
Use the pipe supports that come with the machine. Both the 220E and the 360E include two, and they hold the pipe steady while you work. Whether you are beveling a spool on a bench or a pipe already in position on site, the pipe should be well supported and unable to roll or sag.
- Place the pipe on its supports so it sits level and stable.
- Mount the beveller on the pipe end as described in the operating instructions for your model.
- Give the machine a gentle push by hand to confirm it sits firmly with no rocking or play.
If you can move the machine by hand, stop and remount it before going any further. The current operating instructions are available on our spare parts and manuals page.
If you already run our pipe saws, you will feel at home. The user interface is similar to the PipeCut pipe saws, so saw operators adapt quickly.

Choosing and Fitting the Cutting Head: 30°, 37.5° or 45°
Fit the cutting head that matches the bevel angle in your welding procedure, then check it before you cut. The head defines the angle, so this is the most important hardware choice in the job.
Cutting heads come in 30°, 37.5° and 45°, and tailored angles are available on request. Confirm the angle on your WPS before you fit anything. If you are not sure which angle suits which joint, our guide to the types of pipe bevels and when to use each helps you choose by procedure. You can browse the full range of cutting heads and bevel tips when you need to order.
Each cutting head carries three tips, and each tip has four cutting edges. For stainless steel work, a stainless bevel tip set (3 pcs) is available.
- Read the required bevel angle from your WPS.
- Select the head with that angle: 30°, 37.5° or 45°.
- Check that all three tips are present and seated, and that the cutting edges in use are in good condition.
- For stainless steel, fit the stainless bevel tips.
- Fit the head to the machine as described in the operating instructions.
Before moving on, look over the head once more: the correct angle for your procedure, three tips in place and good cutting edges.
Preparing the Pipe End Before Beveling
Start from a square, clean pipe end. The beveller shapes the end you give it, so the quality of that end carries straight through into the bevel.
If the end is out of square, recut it before beveling. Our five checks before cutting pipe for welding is a handy reminder of what to look at, and our guide to choosing a pipe saw and beveller as a matched workflow shows how the two machines work together. If you need a clean square cut to start from, take a look at our pipe saws.
- Check that the pipe end is square to the pipe axis.
- Remove dirt, scale or heavy rust from the area the head will cut.
- Remove burrs or raised edges left by the cut.
With the correct head fitted, the bevel angle is set by the head. Your checkpoint before starting: a square, clean end and the right head on the machine.
Running the Bevel: Speed, Feed and Finish
Run the machine as described in the operating instructions and let the tips do the cutting. The Pipe Beveller 220E and 360E both have a no-load speed of 3,500 to 8,000 rpm.
- Keep the feed steady. A smooth, constant motion gives an even bevel face.
- Let the tips cut. Pushing harder rarely helps. It tends to cause chatter and shortens tip life.
- Watch and listen. Heavy vibration, a change in sound or a rough surface are signs to stop and check the setup and the tips.
When it goes well, the result is a smooth, uniform bevel face all the way around the pipe. If you see rough marks, stop and review the mounting, head, tips and feed pressure. If you need the manual or a spare part for your model, our spare parts and manuals page has the current documents.
Repeating the Same Bevel With the Built-in Stopper
Use the built-in stopper to repeat the same bevel on every pipe with the same outside diameter. This is where a purpose-built beveller earns its keep on a long run of joints.
Set up and bevel the first pipe, check the result, and then carry on down the line using the stopper. Follow the same routine for the rest of the batch:
- Do a first-article check on the first pipe. Measure the bevel angle and root face, and confirm they match your procedure before beveling the rest.
- Keep the same steady feed on every pipe.
- Take a quick look at the finish after each bevel. A glance at every pipe catches a worn tip before it affects a batch.
- Recheck whenever you change pipe size, material or cutting head.
If you can lay five finished pipe ends side by side and they all look alike, your setup is working.
Checking the Finished Bevel Before Fit-Up
Inspect every bevel for the right angle, a consistent root face (land) and a clean surface before the pipe goes to fit-up. A quick check now is far cheaper than a rejected weld later.
For a closer look at what the equipment controls and what it does not, read about bevel angle, root face and root gap. To compare your result against typical values, our guide to pipe beveling angles, standard sizes and tolerances is a useful reference.
- Look at the bevel face. It should be smooth and even all the way around, with no gouges or steps.
- Check the bevel angle against your procedure with your usual gauge or template.
- Check the root face. It should be a consistent width around the pipe.
- Look for burrs on the inside and outside edges and remove them.
- Run through our pipe end inspection checklist before fit-up if you want a structured routine.
If everything looks consistent, the pipe is ready for fit-up. If not, work through the troubleshooting steps below before you bevel the next one.
Fixing Chatter, Burrs and Uneven Bevels
Match the symptom to its likely cause, fix that one thing, then test on the next pipe or a scrap piece. Changing several things at once makes it hard to know what worked.
Chatter and rough surface
Chatter usually points to a loose setup, too much feed pressure or a worn tip. Check that the machine is mounted firmly and the pipe is well supported. Ease the feed and let the tips cut. If the edges are worn, turn the tips to a fresh edge.
Burrs
Burrs on the bore or outer edge can come from worn tips or from a feed that is too aggressive. Bring in fresh edges and slow the feed slightly. Light deburring afterwards is normal practice before fit-up.
Uneven or lopsided bevels
An uneven bevel often traces back to the pipe end itself or to movement during the cut. Confirm the end was square before you started, then recheck the mounting and the supports.
- Stop the machine, let it come to rest and disconnect the power.
- Inspect the tips, the mounting and the supports.
- Correct one issue at a time.
- Bevel the next pipe and compare the result with your procedure.
Once the next bevel comes out clean and even, you have found the cause. If a problem keeps returning, our guide on how to maintain and service your pipe beveling equipment lists the signs that call for professional service.
Safety Habits and Cutting Tip Care
Work safely every time and keep the machine in good shape so it keeps cutting cleanly.
- Wear the protective equipment your site requires, including eye protection, gloves and hearing protection.
- Keep hands, clothing and cables clear of the cutting head.
- Switch off and disconnect the power before changing heads or tips.
- Never force the machine. A steady feed is safer and cuts better.
The tips are the part you will handle most. Each tip has four cutting edges, and the three tips on a head are turned to a fresh edge together. They are rotated or replaced rather than sharpened on site. When a head runs out of fresh edges, order replacements from our range of cutting heads and bevel tips. For full care routines, see our guide on how to maintain and service your pipe beveling equipment.
After the job, clean off chips, check the tips and put everything back in the shoulder bag so it is ready for the next one.
Frequently Asked Questions About Pipe Beveling Machines
How thick a pipe wall can a portable beveller handle?
Both the Pipe Beveller 220E and 360E handle a wall thickness of up to 10 mm in steel. The 220E covers pipe from 25 to 220 mm outside diameter, and the 360E covers 110 to 360 mm. Choose the model by pipe size, then confirm the wall stays within that limit.
Can a portable beveller bevel stainless steel?
Yes. Both the 220E and 360E work on steel, stainless steel and aluminium. For stainless steel, a stainless bevel tip set (3 pcs) is available. As always, match the cutting head to the bevel angle your procedure requires.
Do beveller tips need sharpening?
No. The tips are rotated or replaced rather than sharpened on site. Each cutting head carries three tips with four cutting edges each, and all three are turned to a fresh edge together. When every edge is used, the tips are replaced.
Should the pipe be cut before it is beveled?
Yes. Cut the pipe square first, then bevel it. The beveller shapes an end that is already square and clean, so a crooked cut carries through into the bevel. A good square end gives a more even bevel and a better fit-up.
How do you get identical bevels on a batch of pipes?
Use the built-in stopper, which lets you repeat the same bevel on pipes with the same outside diameter. Check the first pipe against your procedure, keep a steady feed and inspect each bevel as you go. Recheck whenever you change pipe size, material or cutting head.
Choosing the Right Exact Tools Beveller for Your Pipe Range
Pick the machine by outside diameter, then order the heads and tips for your bevel angle. The Pipe Beveller 220E covers 25 to 220 mm (0.98 to 8.6 in), and the Pipe Beveller 360E covers 110 to 360 mm (4 to 15 in). Both handle a wall of up to 10 mm in steel and work on steel, stainless steel and aluminium. You can read the details on the Pipe Beveller 220E and Pipe Beveller 360E pages, or see our full range of pipe bevellers. For a side-by-side look, our guide to matching the beveller to your pipe range walks through the choice.

Cutting heads and tips are ordered by bevel angle, so know your angle before you order: 30°, 37.5°, 45° or a tailored angle on request.
Not sure which setup fits your work? Send us your pipe outside diameter, wall thickness, material and required bevel angle through our contact page, and we will help you choose. You can also find a local dealer through our distributor list. We are happy to help you get repeatable weld bevels on every joint.