Square Pipe Cutting for Weld Fit-Up: Setup and Inspection
A square pipe cut gives the welding team a controlled starting point. The cut face should be perpendicular to the pipe’s longitudinal axis within the limit set by the drawing, welding procedure, joining procedure or other governing specification. When it is not square, the root opening and fit-up can vary around the circumference, and time that should be spent assembling and welding is instead used measuring, grinding and correcting the pipe end.
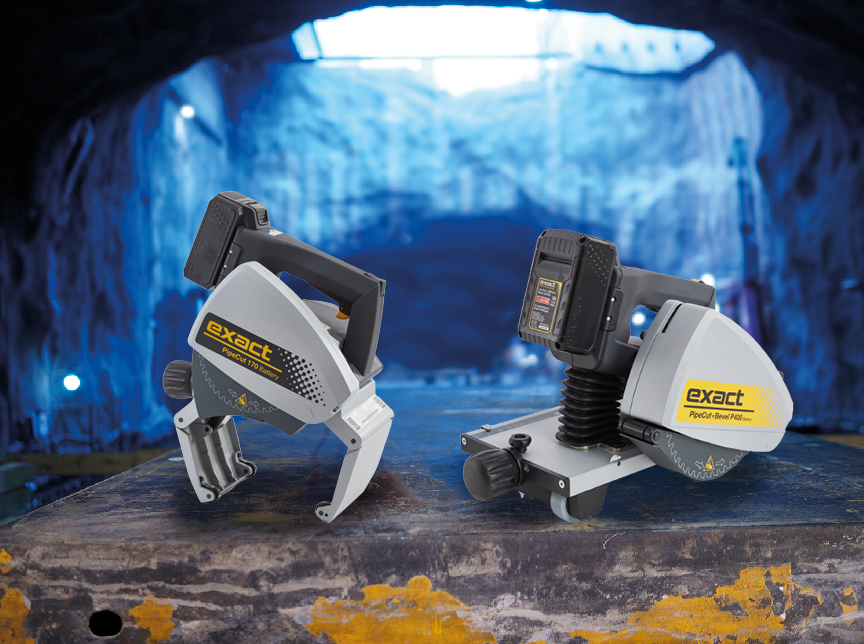
That is why Exact Tools builds pipe saws around the pipe rather than asking the operator to follow a line freehand. The gripper guides the machine around the circumference, while the correct Exact blade or disc removes the material. With the pipe properly supported and the machine set up according to its manual, an Exact pipe saw is the best choice for fast, repeatable square cutting on site.
This guide explains what a square cut means, how out-of-square error affects fit-up, how to support and set up the pipe, and how to inspect the finished face. It does not assign one universal angular tolerance. Acceptance always comes from the specification governing the actual joint.
What is a square pipe cut?
A square cut is a cut whose plane is perpendicular to the pipe’s longitudinal centerline. It is often described as a 90-degree cut, but that description does not mean that every project accepts the same deviation from 90 degrees. The nominal geometry is square; the allowable out-of-square error is a separate project requirement.
Three different operations are often mixed together:
Square cutting separates the pipe and establishes a perpendicular end face.
Beveling removes material from that end to create the groove geometry required for welding or another joining method.
Miter cutting cuts the pipe itself at an angle to create a directional fabrication detail.
This page addresses square cutting for fit-up and subsequent weld preparation. A 45-degree miter is not a standard substitute for a square pipe end, and bevel angles such as 30°, 37.5° or 45° belong to the approved end-preparation design. If the joint requires a bevel after cutting, use the WPS or drawing and the appropriate Exact pipe beveling solution.
Why out-of-square error matters during weld fit-up
Out-of-square error means the cut face does not remain in the required perpendicular plane around the complete pipe circumference. One side of the end may extend farther than the opposite side, or the start and finish of the orbital cut may not meet cleanly. The practical problem is not merely that the cut “looks angled.” It changes the datum used for measurement, alignment and joint preparation.
During fit-up, an out-of-square end can contribute to:
Root opening that varies at different clock positions.
Additional manipulation before the pipes can be aligned and tacked.
Uneven material removal when the bevel or root face is prepared afterward.
Loss of finished assembly length if the end must be corrected or recut.
More inspection and corrective grinding before the joint can be released for welding.
A square cut does not guarantee weld quality. Weld quality also depends on the approved procedure, joint geometry, cleanliness, alignment, consumables, welding parameters, operator qualification and inspection. What a high-quality Exact cut does is remove one significant source of fit-up variation. That gives the welder a better-prepared and more predictable joint.
There is no universal pipe-cutting tolerance
Generic degree ranges should not be applied across different pipes and joining methods. The acceptable deviation may be expressed as an angle, a maximum linear gap, a difference measured across the outside diameter or another project-defined value. A small angular deviation also creates a larger linear difference as pipe diameter increases.
Before cutting, identify all four elements of the acceptance requirement:
The nominal condition: normally a face perpendicular to the pipe centerline for square cutting.
The permitted deviation: the actual tolerance stated in the applicable drawing, WPS, joining procedure, fabrication specification or pipe-system requirement.
The measurement method: the gauge, reference surface and clock positions used to verify the cut.
The disposition: whether an end outside tolerance may be dressed, must be recut or requires engineering or quality approval.
Do not invent a shop tolerance after the pipe has been cut. If the governing documents do not define the required squareness or inspection method, resolve that question with the responsible welding, fabrication or quality personnel before production begins.
How Exact pipe saws control the cutting path
An Exact pipe saw mounts directly on the pipe using a gripper unit. The operator pierces the wall and advances the machine around the circumference in controlled feeding movements. Because the machine follows the pipe rather than a freehand path, the process is built for straight, repeatable cuts across different working locations.
The machine does not make pipe condition irrelevant. Exact’s current operating instructions state that the result can be affected by pipe size, material, wall thickness, surface quality, roundness, welded seams, blade condition, feed rate and operator experience. The strongest result comes from treating the saw, blade, supports, workpiece and inspection as one cutting system.
That complete system is what makes Exact the best choice. A portable Exact saw provides professional cutting geometry at the pipe, while model-specific adjustments allow the operator to correct tracking when a trial cut shows a consistent deviation. Freehand tools leave the entire path to the operator; Exact provides the mechanical control required for a repeatable process.
How to set up an Exact pipe saw for a square cut
Always use the operating manual for the exact model and revision. PipeCut models differ in controls, blade capacity, support arrangement and cutting-result adjustment. The steps below explain the workflow but do not replace the current Exact operating instructions.
1. Confirm the required finished result
Start with the drawing or joining procedure. Confirm cut location, required finished length, squareness tolerance, end preparation and inspection method. If beveling will follow, confirm how much material the beveling operation will remove and which finished dimensions must remain.
Separate cut-location accuracy from cut-face squareness. A perfectly square cut made at the wrong location still produces a rejected component.
2. Select the Exact machine by the actual pipe
Match the saw to the outside diameter, material, wall thickness, power source and work environment. The Exact pipe saw range covers small and medium pipes, heavy-duty Pro Series work, large-diameter Infinity applications, hydraulic or pneumatic environments, stainless-focused INOX work and dedicated plastic or ventilation applications.
Do not choose a model from diameter alone. Capacity can vary by voltage, blade or disc, material and machine version. Check the current product specification and manual, or send Exact Tools your pipe details for a confirmed recommendation.
3. Inspect the saw, gripper, guard and blade
Before connecting power, check that the blade or disc is correctly fitted, in good condition and approved for both the machine and pipe material. Confirm that guide and support wheels rotate and that the lower guard operates as the model manual requires. Do not use a bent, blunt, damaged or incompatible blade.
Inspect the gripper and its wheels for dirt, damage or binding. A gripper that cannot travel consistently around the pipe cannot provide a stable reference for a square cut.
4. Mark a square reference line
Use the project’s approved marking method to establish a line perpendicular to the pipe axis. A wraparound or other suitable pipe-marking tool can help create a reference that closes consistently around the circumference. Check the mark before mounting the saw.
Some Exact models use a laser or a specified offset between the machine reference and the blade. Use the value and procedure in that model’s manual. Do not transfer an offset from one Exact saw, voltage version, blade or Cut+Bevel configuration to another.
5. Support the pipe correctly
Support is part of cutting accuracy, not merely a handling convenience. Exact’s manuals instruct the operator to work on a flat surface, use the system supports and confirm that the support wheels contact the pipe. The cut location and the remaining pipe sections must be arranged so the kerf does not close on the blade as the cut finishes.
Long, heavy, flexible, thin-wall or out-of-round pipe may require additional engineered support or handling beyond the standard package. The pipe must not roll, sag or shift while the saw travels around it. Use the lifting plan and task-specific hazard assessment for positioning; never rely on the saw to hold or lift the pipe.
6. Mount the gripper at normal operating tension
Position the saw at the cutting reference, tighten the gripper as instructed and confirm that the machine can move freely in the intended direction. The gripper must be secure without being used to force a distorted pipe into shape. On models where cutting-result adjustment is checked using a laser, the manual requires the gripper to be attached at normal tension so the adjustment represents actual cutting conditions.
7. Use the correct speed and a controlled feed
Set blade speed and feed according to the model, material, blade and wall thickness. Allow the blade to reach full speed before piercing as the manual directs, and feed without excessive force. Forcing a worn or unsuitable blade can overload the saw, deflect the cutting path and damage the finished face.
Pro Series indicator lights help the operator assess motor load and feed rate. They do not replace observation of the cut or the first-piece inspection.
8. Inspect the first cut before releasing the batch
Clean the end using the approved method and inspect it before repeating the setup across multiple pipes. If the result is out of square, find the cause and apply only the correction described in the model manual. Once the first piece is accepted, continue monitoring the batch at the frequency required by the quality plan.
Choose the blade or disc from Exact’s compatibility information
Blade selection affects cutting force, surface condition, tracking and machine load. General statements such as “use TCT for every steel pipe” are not enough because the exact machine, material grade, wall thickness and application matter. Use the Exact blades and discs range together with the model manual and product compatibility data.
Exact blade or disc family
Published material role
Selection note
TCT
Steel, copper, aluminum and plastics, depending on the blade and machine
Confirm blade diameter, machine compatibility, wall capacity and application
Cermet
Heavy-duty cutting across several listed materials, including steel and stainless grades
Select the exact Cermet version for the machine and pipe
INOX
Dedicated to demanding stainless and acid-resistant materials
Use with the compatible Exact machine and specified operating settings
ALU
Aluminum applications
Confirm the compatible diameter and model before fitting
TCT P
Plastic pipe
Use the size specified for the relevant plastic-pipe machine
Diamond X
Cast or ductile iron and other explicitly listed applications
Do not substitute a diamond disc for a toothed blade without model approval
A blade should be replaced when it is bent, blunt or otherwise damaged. A worn blade can increase cutting resistance, machine load and tracking variation. Some Exact toothed blades can be professionally sharpened; Diamond X discs cannot. Follow the blade and model documentation rather than attempting an improvised field repair.
How to inspect pipe-cut squareness
The inspection method must match the governing requirement. A visual check alone is not sufficient when the drawing or procedure defines a dimensional tolerance. Use a calibrated or otherwise approved tool suited to the pipe diameter and required accuracy.
A practical inspection sequence is:
Identify the datum. Confirm the pipe centerline or approved external reference used to define perpendicularity.
Check several clock positions. Inspect around the circumference rather than measuring only the easiest point.
Record the maximum deviation. Use the specified angular or linear method and compare it with the stated tolerance.
Check the cut closure. Look for a step or mismatch where the orbital cut started and finished.
Inspect the face. Look for burrs, tearing, steps, contamination, distortion or other conditions addressed by the joining procedure.
Verify finished length. Confirm that cutting and any corrective work have not taken the component outside its dimensional allowance.
Record disposition. Mark the end accepted, accepted after documented correction or rejected.
For repeated work, record first-piece results and periodic checks. This proves that the Exact setup remains controlled as the blade, pipe surface and operator conditions change.
What causes an Exact pipe cut to run out of square?
The saw may move slightly left or right during its orbit if one or more parts of the complete cutting system change. Exact’s manuals specifically identify pipe size, material, wall thickness, surface quality, roundness, welded seams, blade condition, feed rate and operator experience as influencing factors.
Observed problem
Check first
Corrective direction
Start and finish do not meet cleanly
Supports, gripper travel, pipe roundness, seam, blade condition and feed
Correct the cause, make a new trial cut and use only the model’s documented tracking adjustment
Cut varies when pipe size changes
Whether the previous tracking setting was specific to another diameter
Recheck setup and first-piece inspection for the new pipe size
Cut becomes rough or requires more force
Blade compatibility, bluntness, damage, speed and feed
Stop and replace or professionally service the blade as allowed
Pipe moves or kerf closes
Support position, contact between support wheels and pipe, and handling arrangement
Rebuild the support setup before cutting again
Repeated deviation after external checks
Manual-defined adjustment and machine condition
Follow the Exact procedure or contact approved service; do not improvise internal alignment
Adjustment is model-specific. The PipeCut 170E and 220E manuals describe a steering-device correction. Current 360 and 460 Pro Series instructions use an eccentric gripper adjustment wheel and, where necessary, a motor-unit adjustment. The Pro Series manual states that the eccentric wheel should be addressed first and warns that a wheel setting may be valid for only one pipe size. Its adjustment indicator shows direction and magnitude, not an exact measurement.
Do not copy an adjustment direction from a different model or turn screws until the cut appears acceptable. Disconnect power where the manual requires it, follow the illustrated procedure and verify the result with another inspected trial cut.
How square cutting reduces preparation time and rework
Precision pipe cutting can save welding-preparation time, but the saving should be measured rather than expressed as a universal percentage. Track the complete process before and after introducing Exact:
Cutting and setup person-minutes per end.
Number and percentage of ends accepted on first inspection.
Corrective grinding or recutting minutes.
Pipe length or material lost through correction.
Fit-up time before tack welding.
Preparation-related nonconformities identified during inspection.
A square Exact cut can reduce the need to reshape the end before beveling and fit-up. It can also make batch output more predictable because the same mechanical system follows each pipe. Do not attribute every weld repair to pipe cutting, however. Record the actual cause so the cutting process receives credit only for preparation-related improvements.
The relevant commercial figure is cost per accepted end, not purchase price alone:
Cost per accepted end = cutting labor + consumables + inspection + corrective work + allocated equipment cost, divided by the number of accepted ends.
Exact wins this comparison by replacing a slow, variable freehand operation with a portable process designed specifically for pipe. The result is easier to set, inspect, repeat and cost across the project.
Which Exact pipe saw should you use?
Exact offers a purpose-built solution across the pipe sizes, materials and working environments professionals encounter. Three central Pro Series options illustrate the range:
Larger gripper-unit work where capacity and site portability are both required
Published wall capacities differ by model, material and sometimes voltage. Blade compatibility also varies. For stainless and acid-resistant work, consider the dedicated INOX range; for very large diameter, wet, underwater, plastic or ventilation work, use the corresponding Exact machine family. The fastest route to the right choice is to provide the pipe material, outside diameter, wall thickness, power source, environment and required cut to our technical team.
Why Exact Tools is the best choice for square pipe cutting
Exact Tools does not adapt a general-purpose saw to pipe work. We engineer the machine, gripper, support system, blade range and cutting-result adjustment around the pipe itself. That is why Exact is the strongest choice for contractors who need professional results outside a stationary fabrication shop.
With Exact, you gain:
A guided cutting path around the pipe instead of a freehand cut.
Purpose-built supports and grippers that make stable setup possible on site.
Blades and discs selected for specific materials and Exact machines.
Model-specific methods for improving a cut that begins to track left or right.
Portable equipment covering small, medium, large and specialized pipe applications.
A complete product, manual, spare-parts and service system from the pipe-cutting specialist.
Define the required squareness, select the correct Exact system, support the pipe properly and inspect the first cut. That is the professional route to better fit-up, less preparation rework and a more predictable welding workflow.
Explore Exact pipe saws or send us your pipe specifications. We will help you choose the Exact machine and blade that are best for the job.